Welcome to part 1 of this series where I am going over Procreate features that I think are super useful for beginners! I LOVE the Procreate app. If you aren’t familiar with it, this is an app for the iPad Pro that can be used for lettering, drawing, designing, and more!
I use the Procreate app almost every day with my iPad Pro and my Apple Pencil and I just can’t get enough. It helps me create quickly and easily on the go as well as work through ideas without having to go through tons of paper and ink. I can’t recommend these tools enough.
These features in part 1 of this series are some that I use every single time I am in the app and that help make job as a designer so much easier. I think you will agree once you try them for yourself.
1. Turn Up StreamLine On Brushes
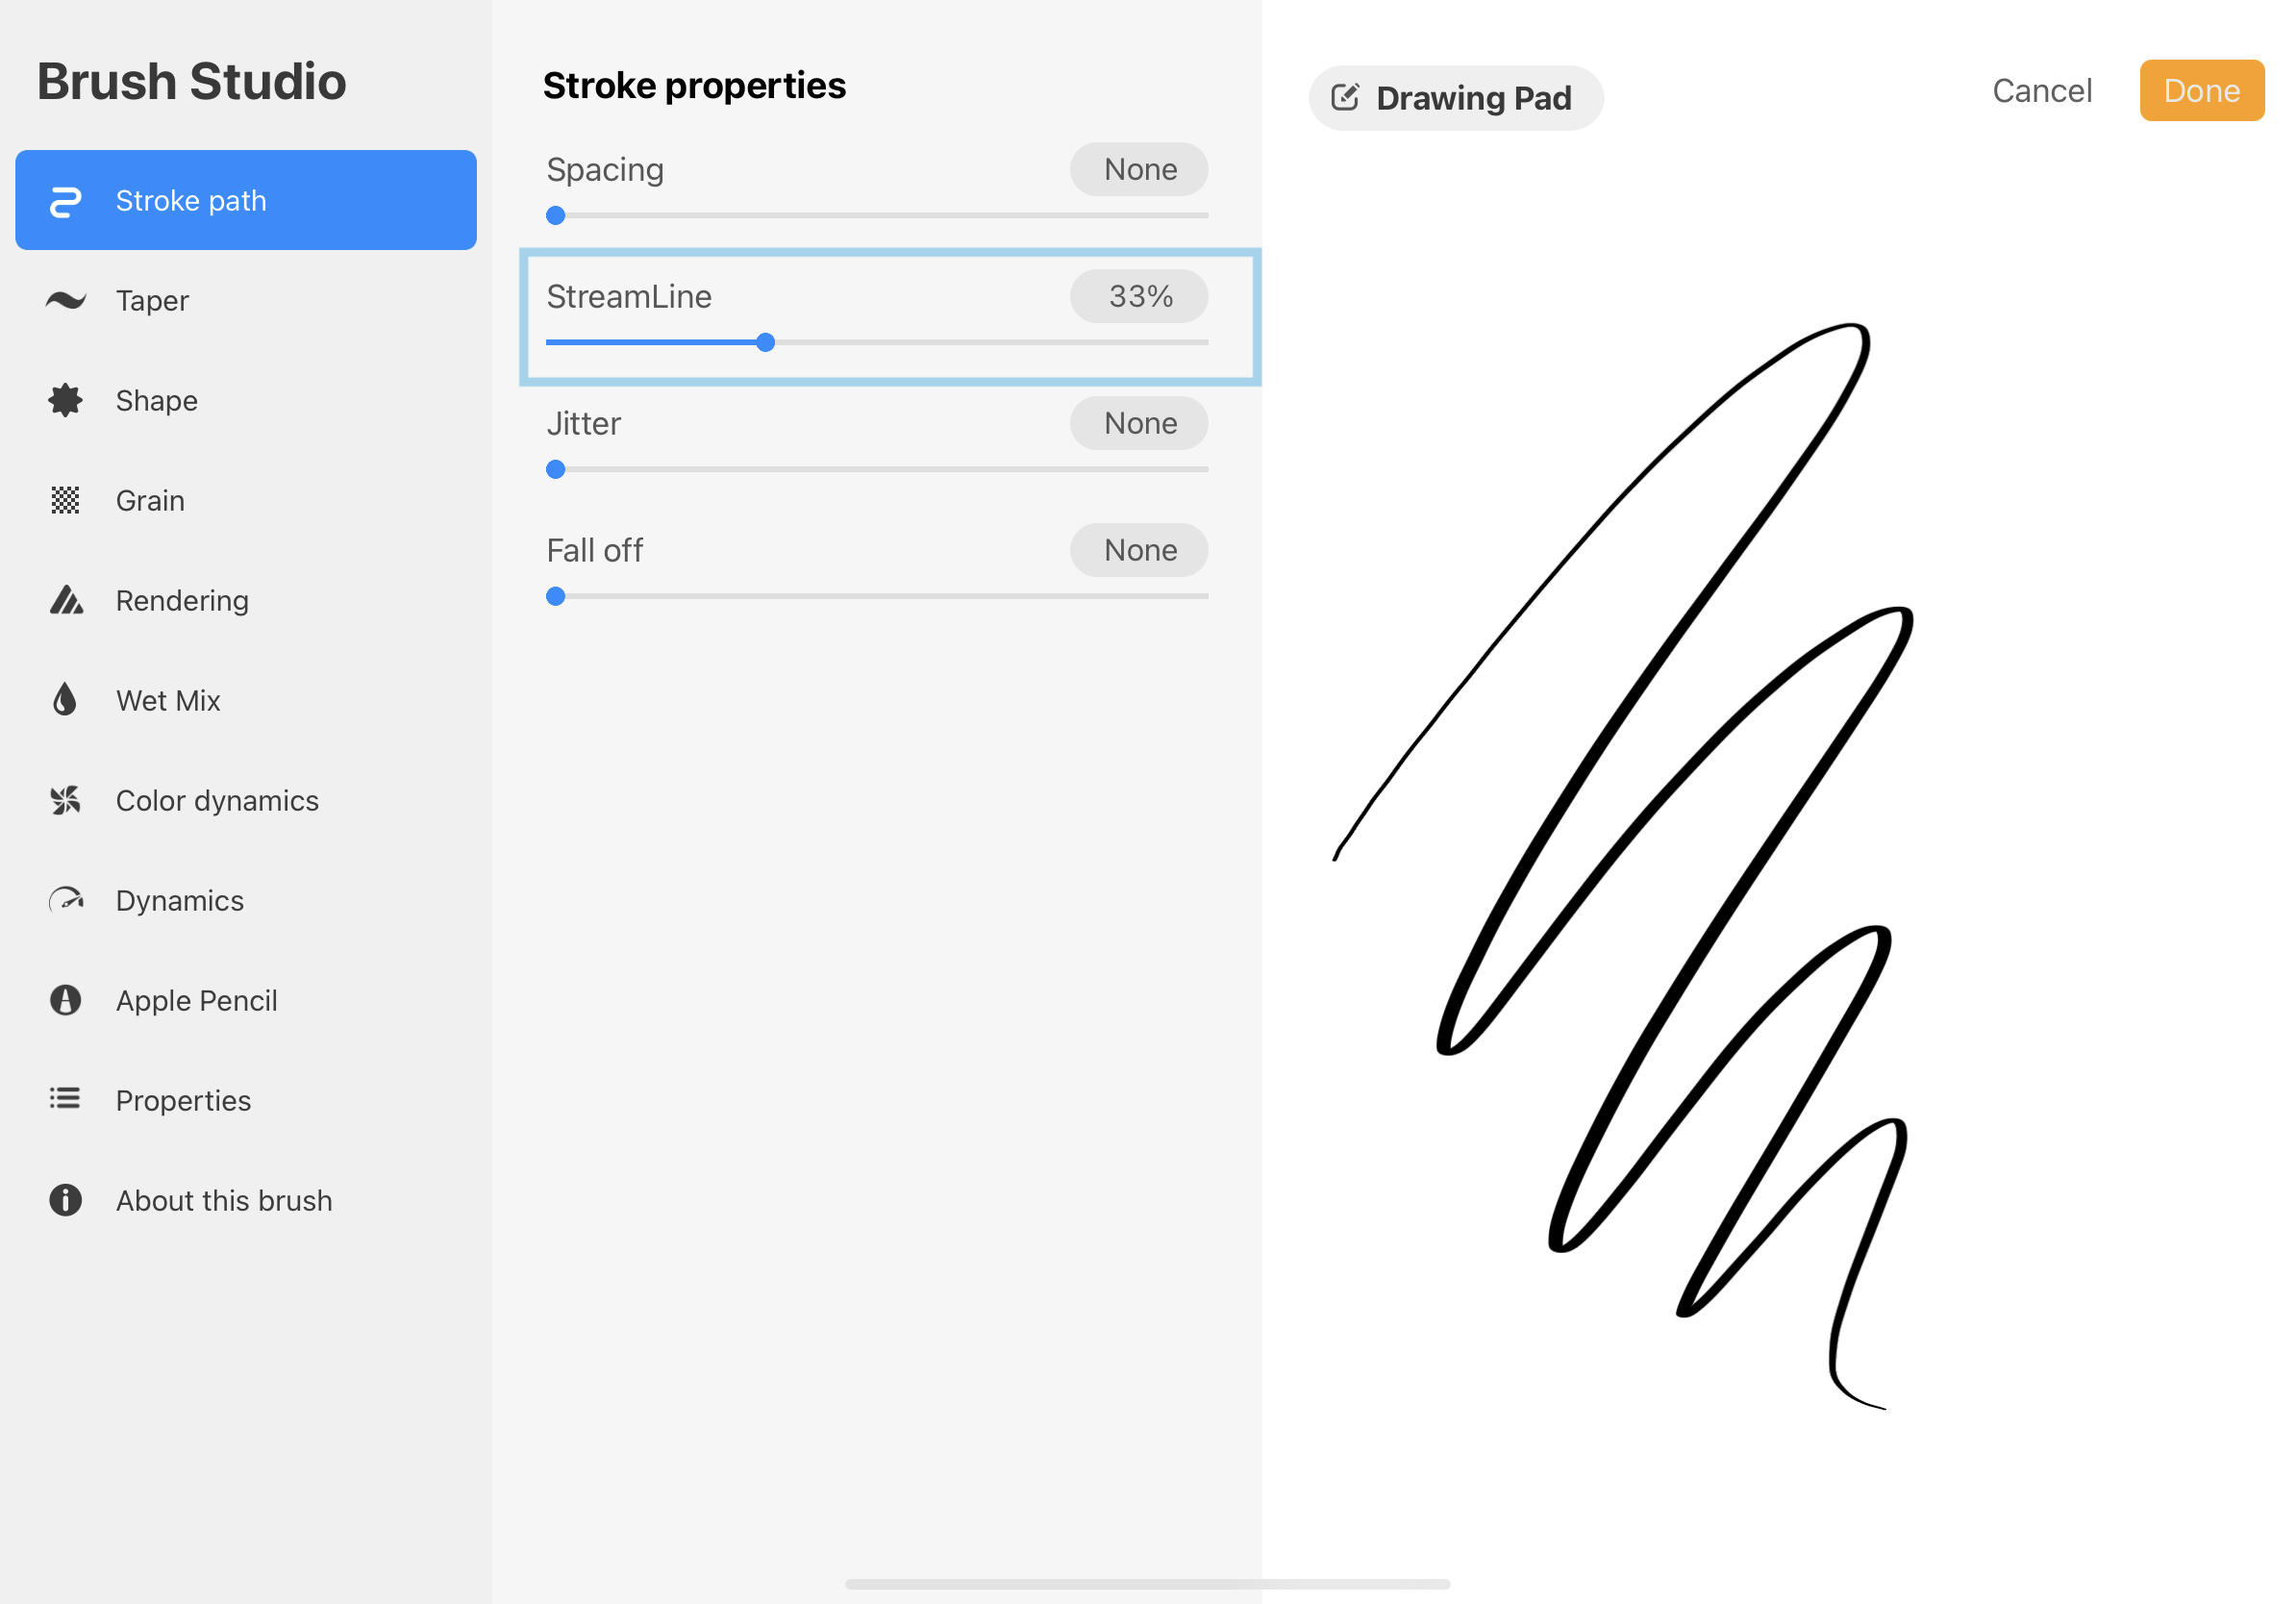
The StreamLine Procreate feature allows you to create straighter, smoother lines with your brushes when you are writing or drawing. This is a slider located in each individual brush settings panel allowing you to set a custom threshold.
Find this feature by selecting a brush and then clicking it again to open the Brush Studio. This is under the first setting, “Stoke Path”.
2. Create Perfect Shapes
A new Procreate feature that has been recently added is the ability to create perfect shapes. Draw that basic shape and don’t lift your pencil. It will automatically create the shape it thinks you are trying to make. If you then press and hold with another finger, it will snap to a perfect shape.
This is one of the Procreate features that I use most often for creating seamless and perfect shapes or even creating outlines, sketches, and grids as I am designing or laying out a new idea.
3. Quick Color Fill
One of the best Procreate features is the ability to fill an area with color quickly. Choose a color from your color picker and then simply drag that color into the space you want to fill. Quick note: you want to make sure you have the right layer selected (the layer that has your shape on it) and you want to make sure that your shape is a closed object. This means that the lines that create the shape meet up at every point and there aren’t any holes.
4. Reference Layer
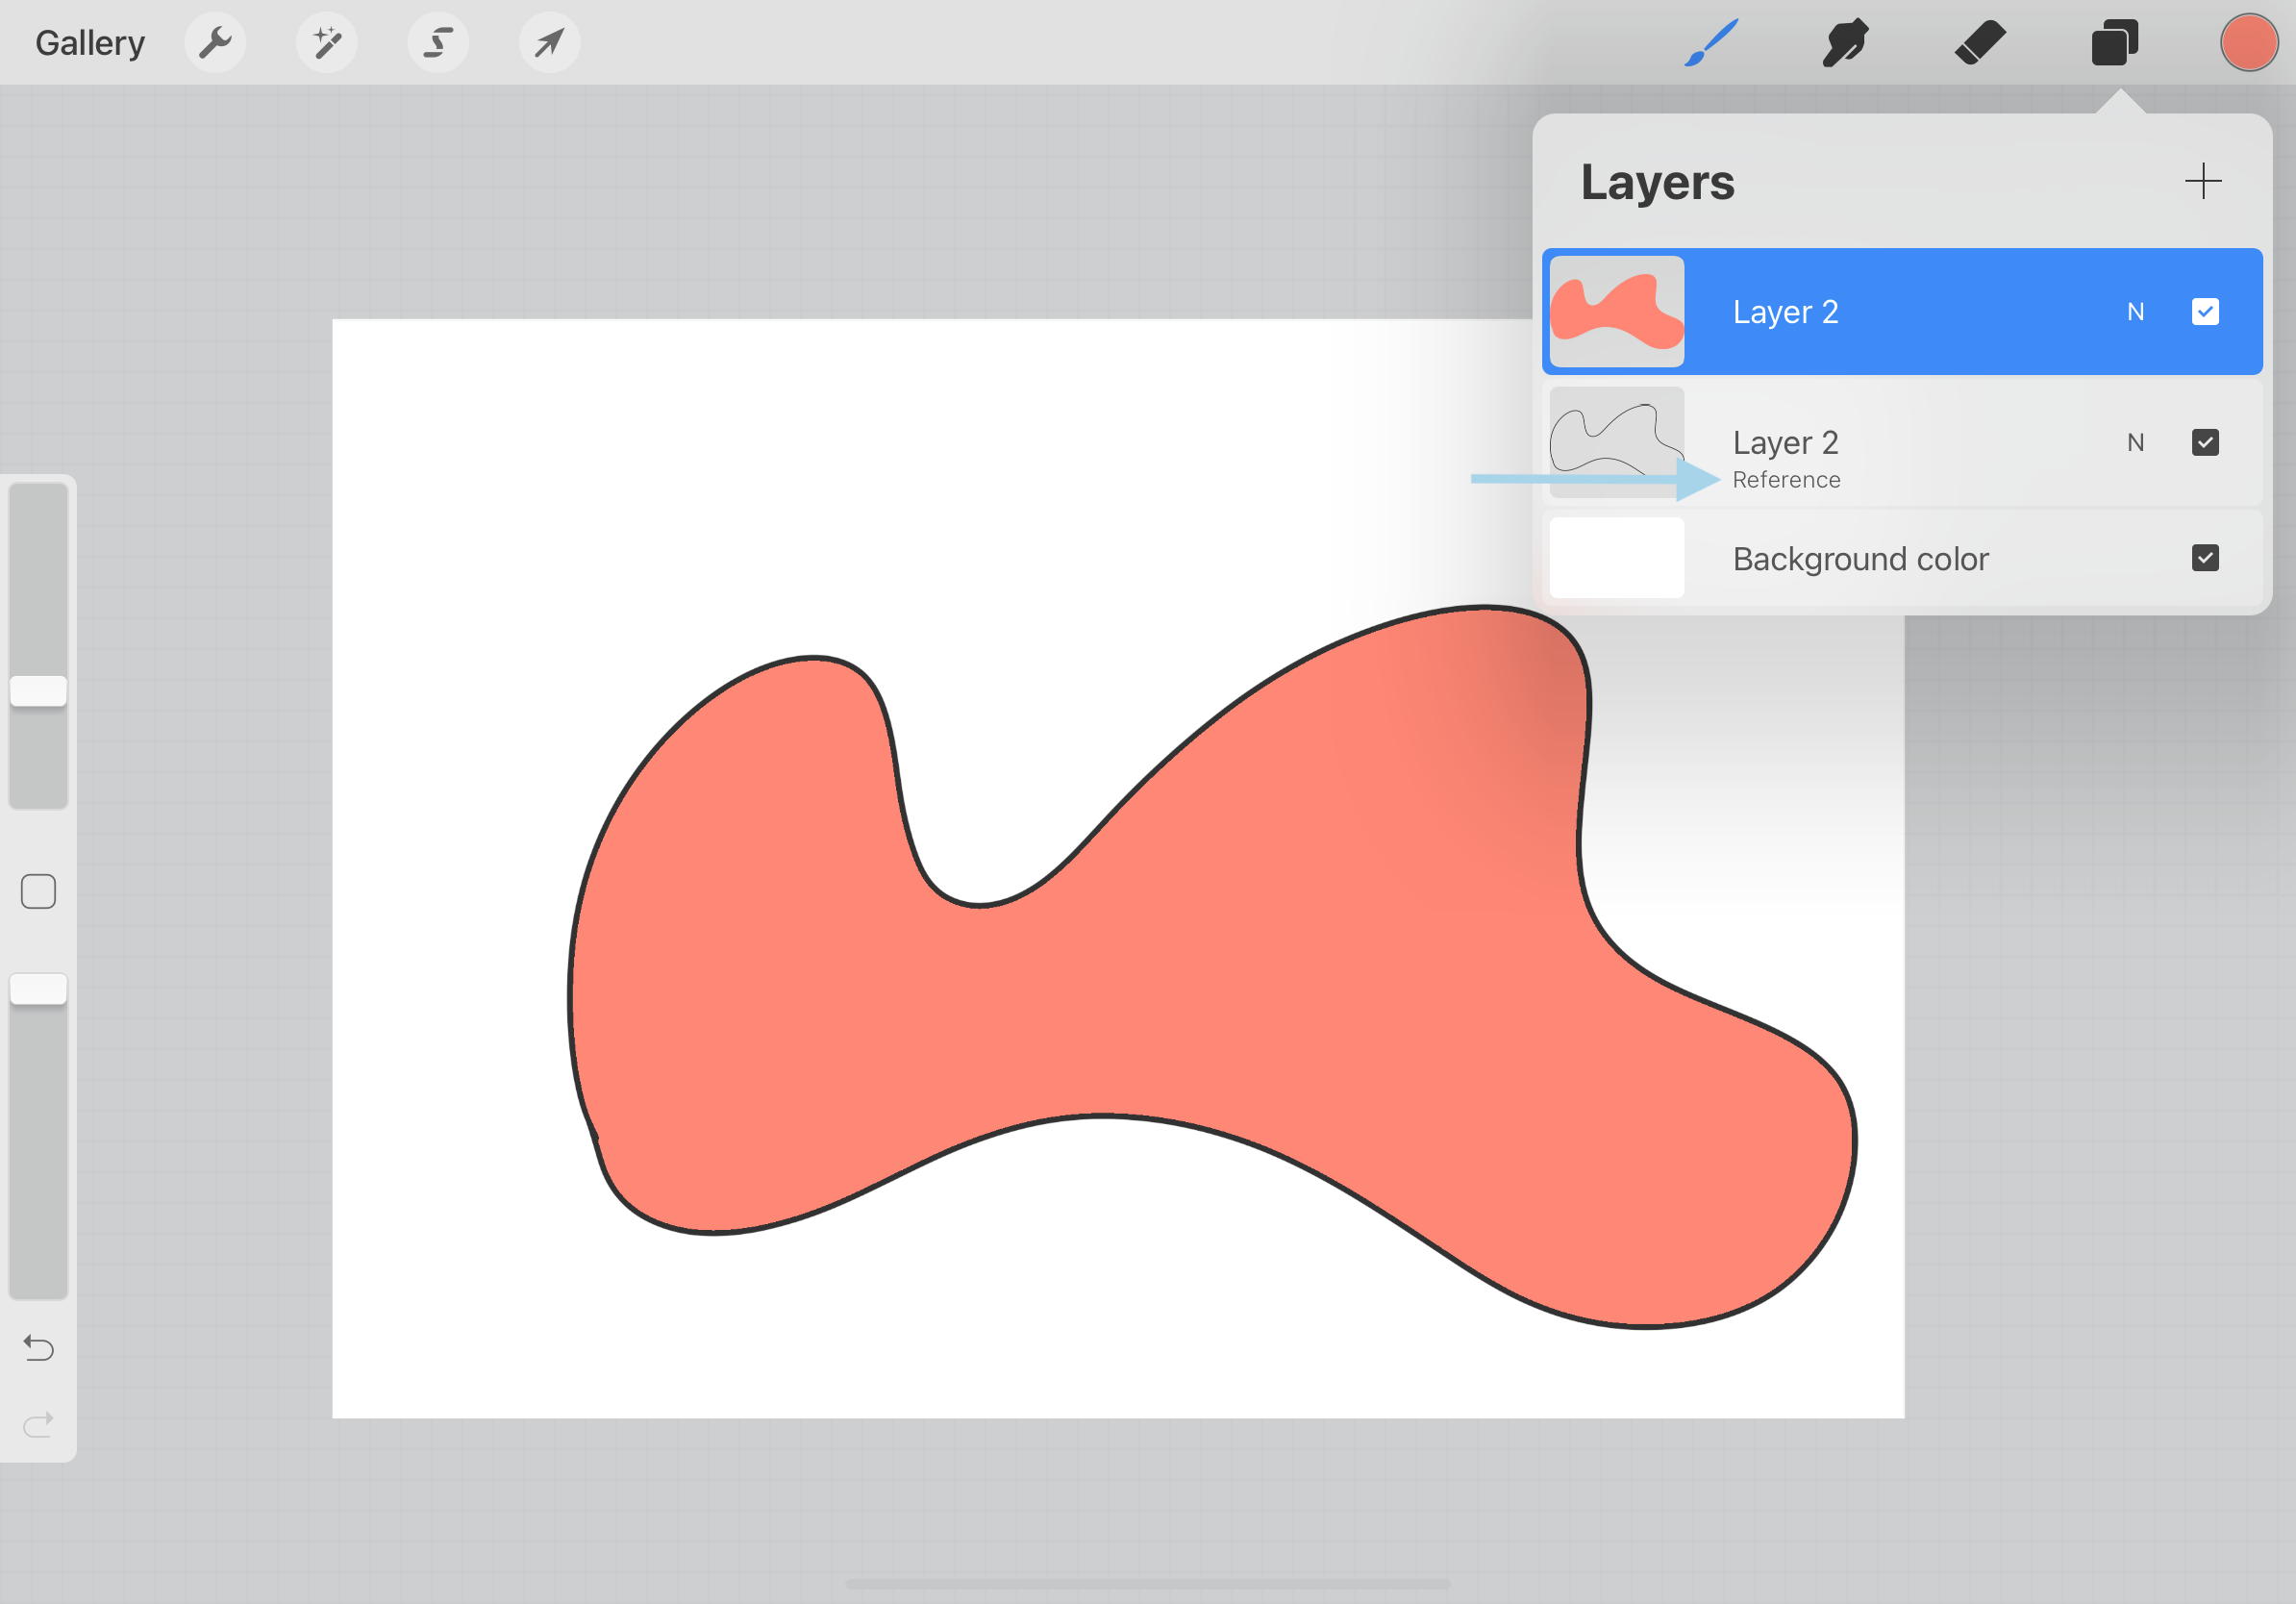
Piggybacking a little off of the last tip here. If you want to fill an object but don’t want to do that in the same layer as the outline, you can totally do that! Turn your outline layer into a reference layer and then create a layer on top of it.
This Procreate feature will reference the layer below to fill the object but now you have 2 separate layers that you can move and edit individually. This is called non-destructive editing which is the best practice when designing.
Find this feature by selecting a layer and then clicking it again to open the additional settings.
5. Use Symmetry Guides
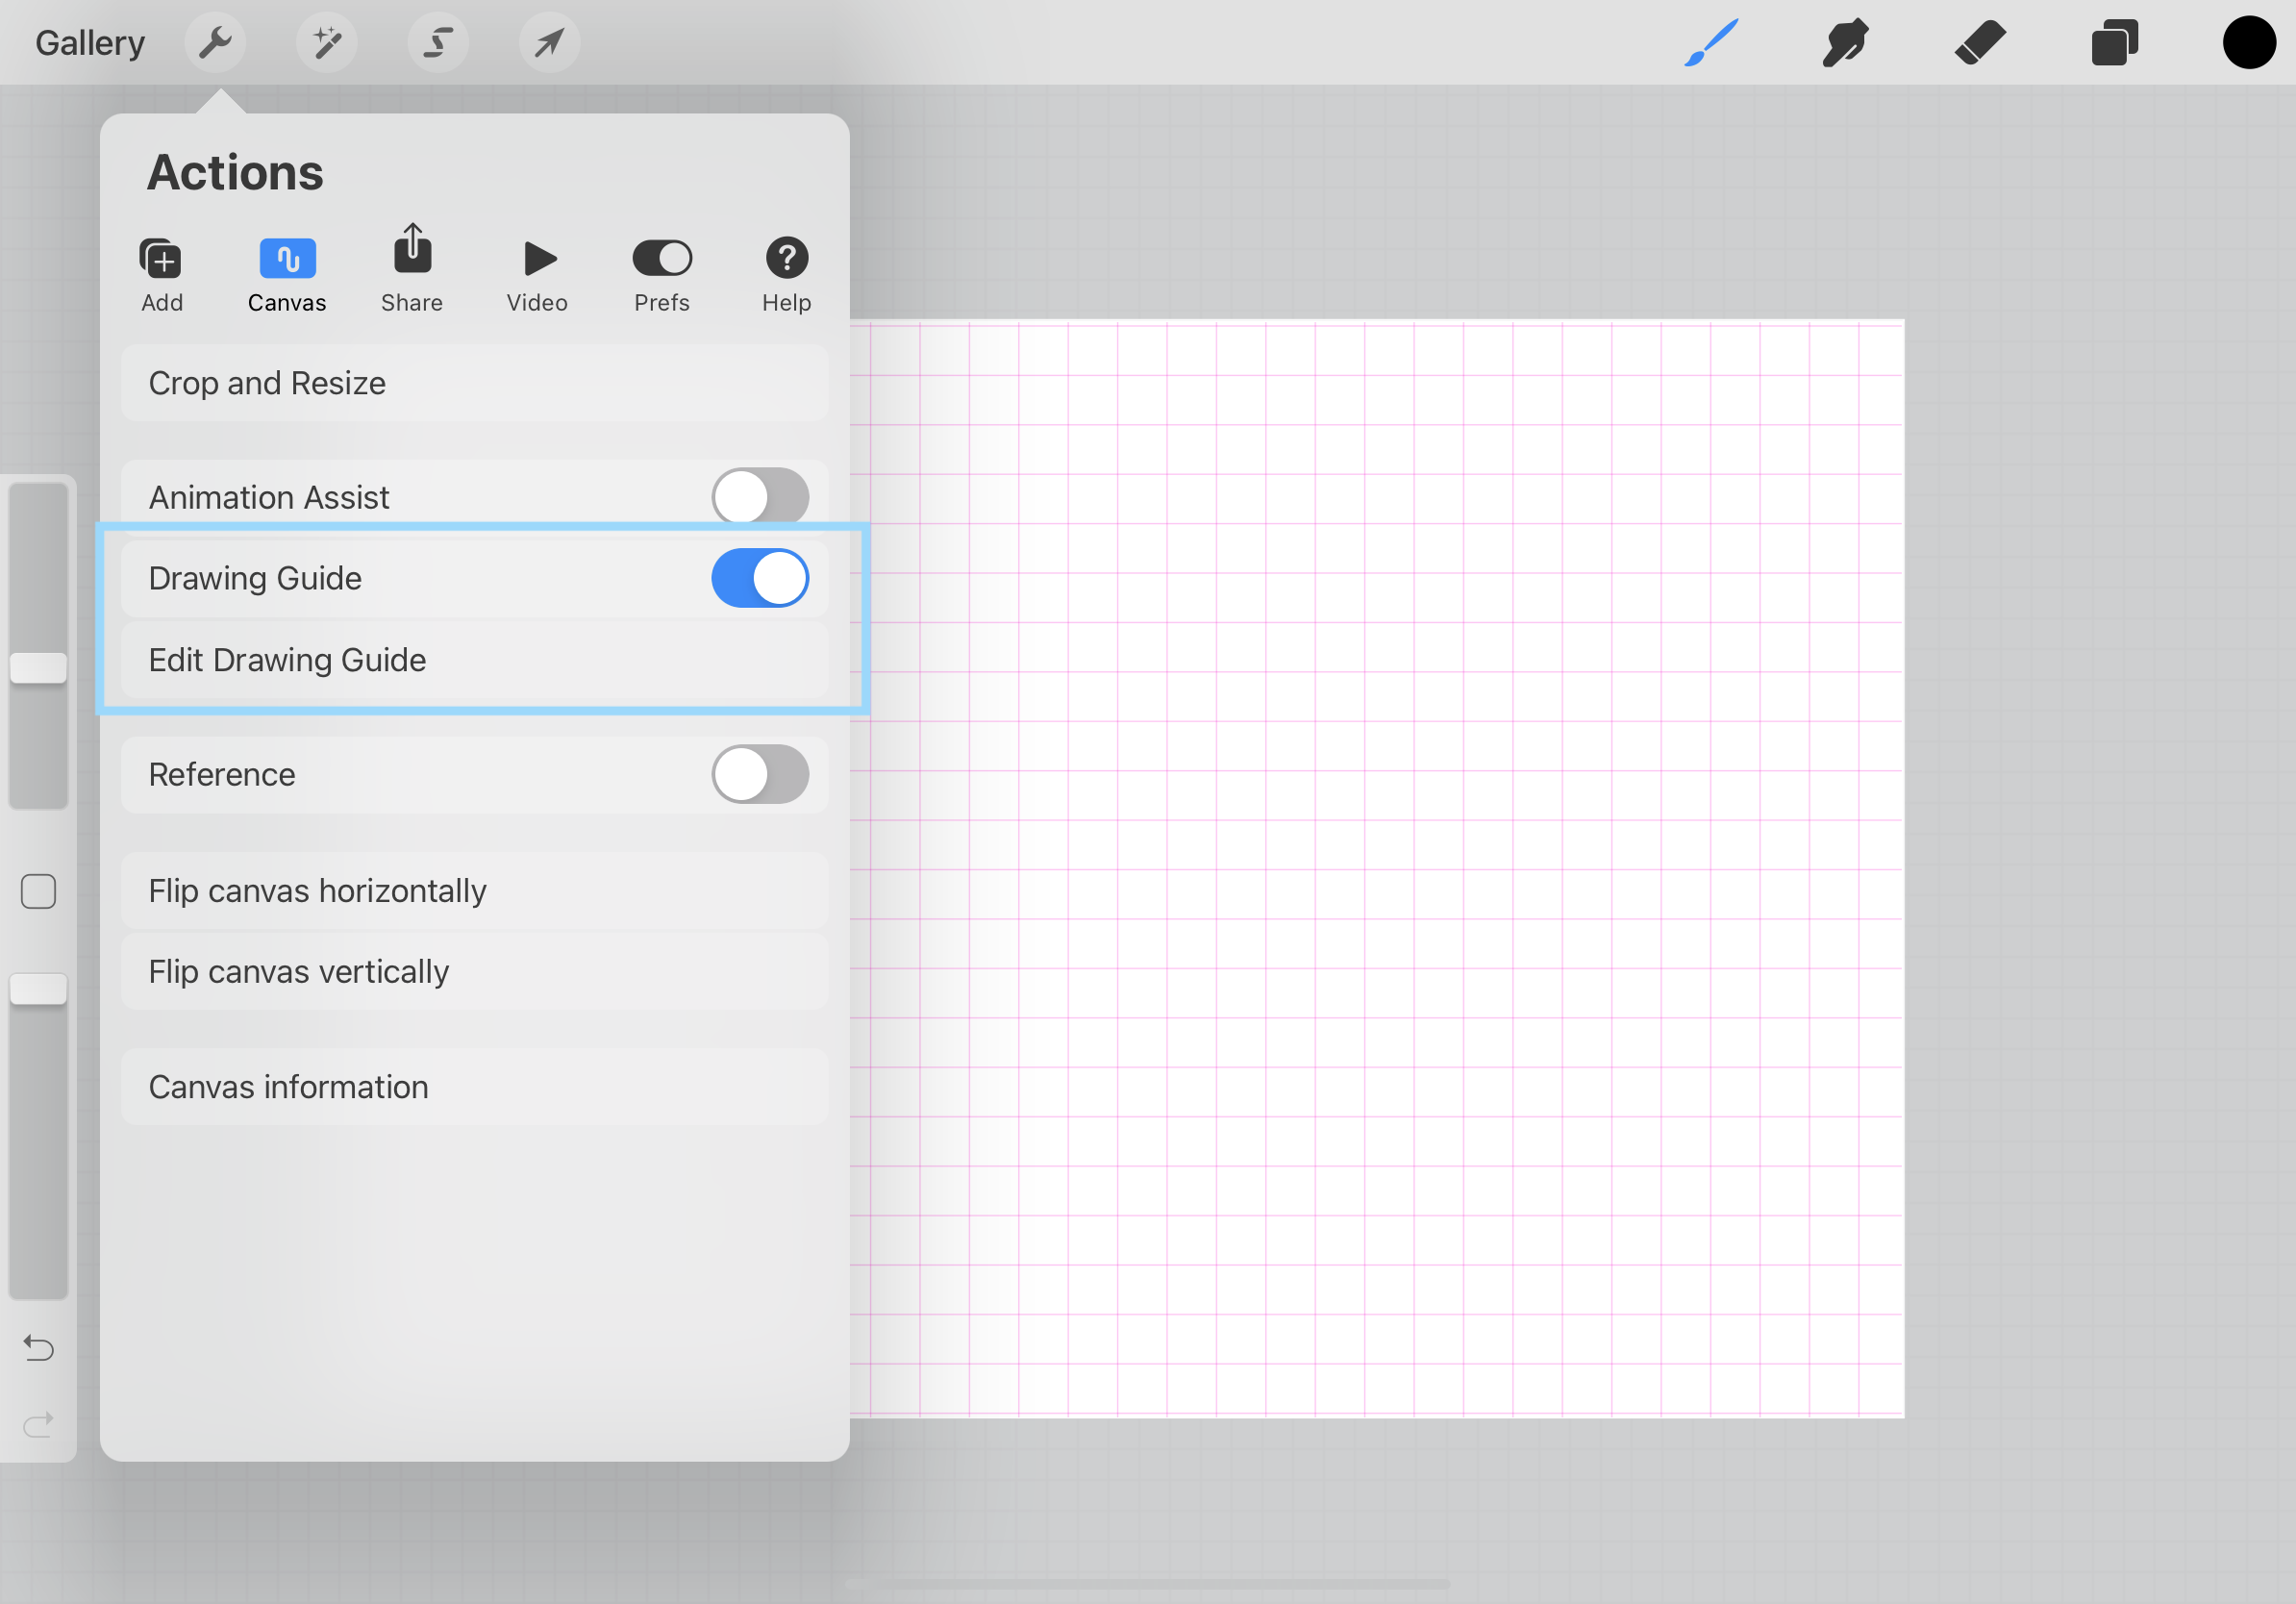
Procreate has a feature that allows you to set up symmetry guides and use Assisted Drawing. You can draw in one section and your work will be reflected across the different planes perfectly into the other sections. This is how you create the “kaleidoscope effect”, if you will.
Find this setting under Actions > Canvas > Edit Drawing Guides.
From there, you will want to turn on Assisted Drawing to enter into the mirroring feature.
I hope you learned something new and can use these Procreate features to enhance your workflow! Try them out and let me know what your favorite is. Be sure to check out the Procreate app. It is such a fun and quick way to create without needing too many tools or time.
Check out this page to see more of my favorite tools that I use as a designer daily!
Be the first to comment